|
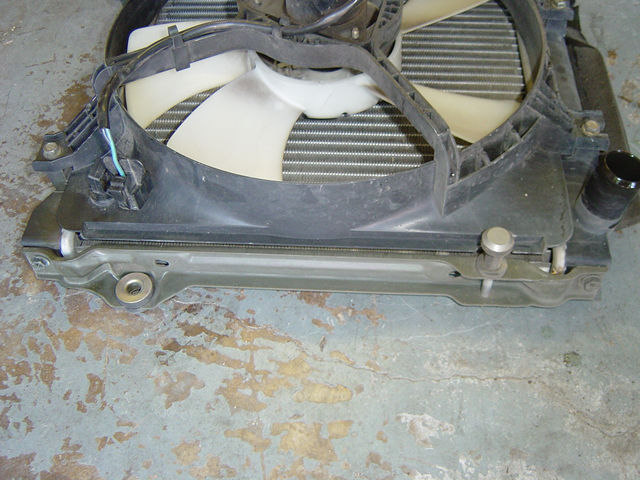
There are two radiator brackets that
hold the radiator into place. These will be modified and reinstalled
to the radiator. This modification lowers the radiator down 1/2".
- Remove the two 10mm bolts that
hold the radiator brackets on the sides of the radiator as shown
in Photo 2-A.
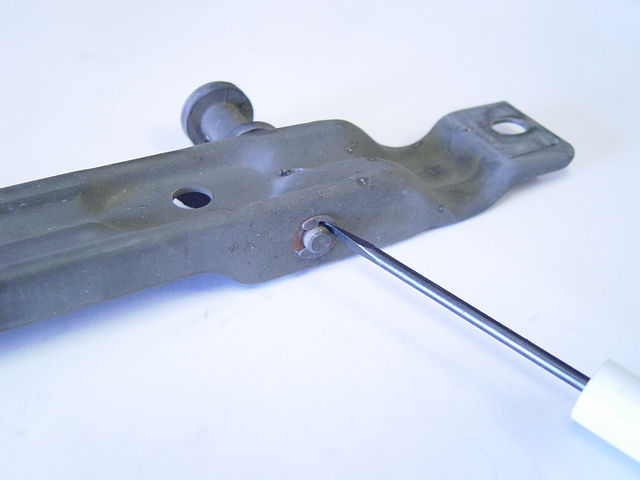
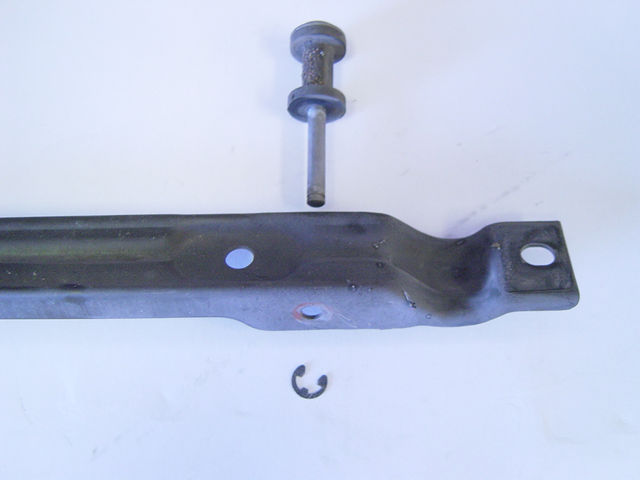
- Remove the C-clip from the rubber
support bracket using a small screwdriver as shown in Photo
2-B. Do not lose this clip as you will reuse it in the reinstallation
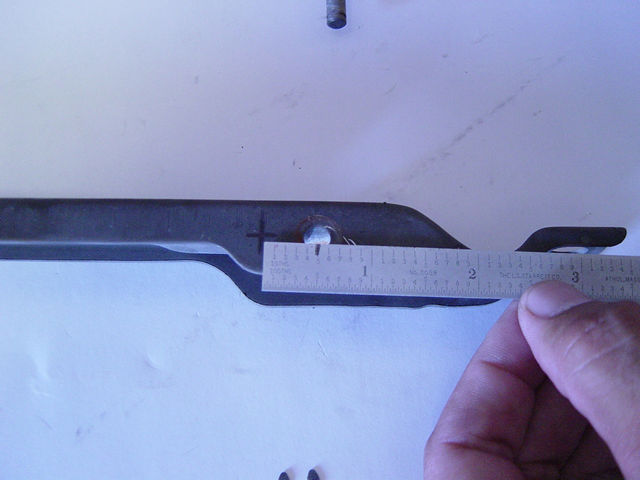
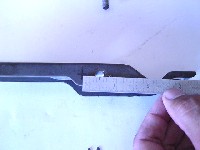
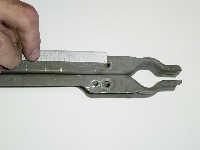
- Using a ruler, measure and
mark a 1/2" from the stock mounting hole location
as shown in Photo 2-D. Be sure to mark toward the middle as we are
lowering the radiator. Modify the other mounting bracket as shown
in Photo 2-E.
- Reinstall the rubber support
bracket into the new hole on the radiator bracket. Be sure
the rubber support is on the fan side as shown in Photo 2-A.
- Reinstall the modified radiator
brackets using the factory 10mm bolts.
 |
|
|
| Photo
2-D: Measure 1/2" from the factory hole and drill |
Photo
2-E: Measure and drill hole in the other bracket |
|
|