Step 10 - Attaching The A/C Evaporator Coil To The Radiator
 

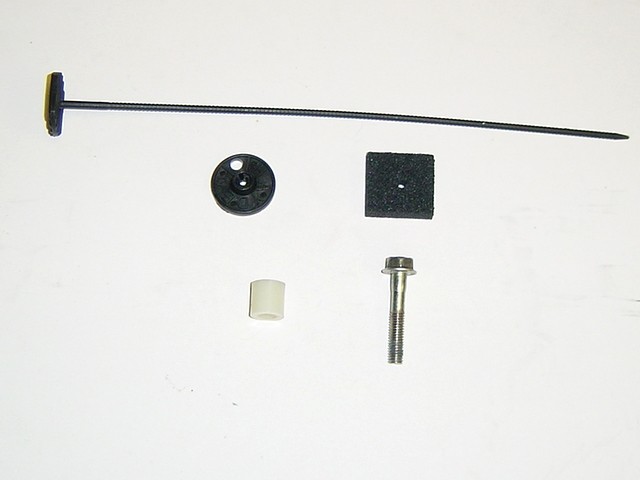
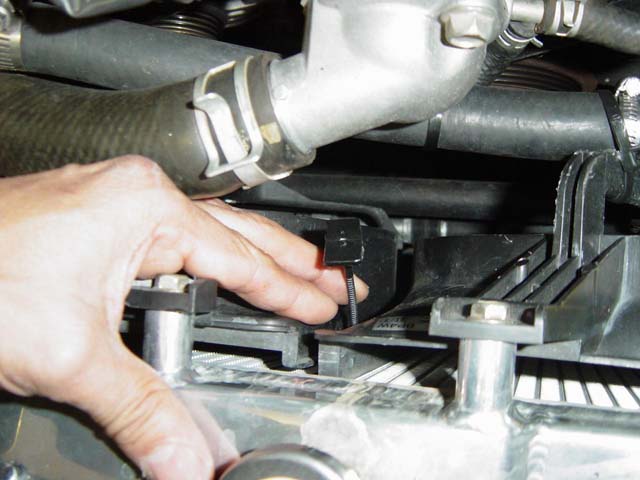
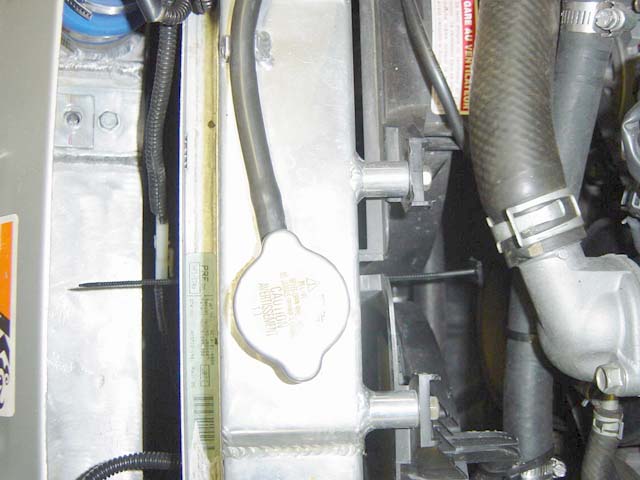
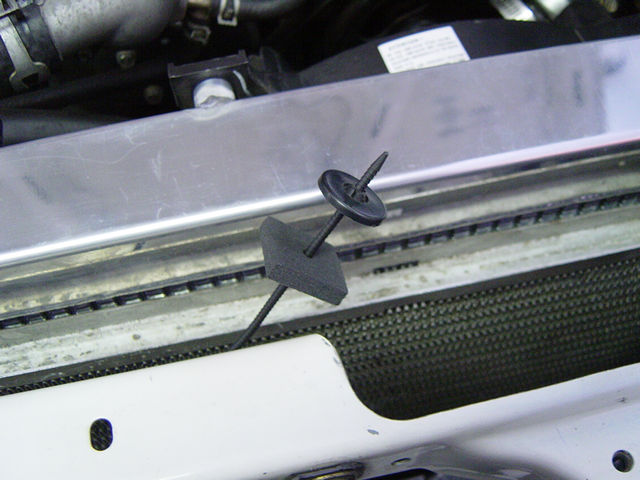
In STEP 5 you bent the upper brackets that have the factory rubber grommets to provide clearance between the radiator and the evaporator coil. The A/C evaporator coil is supported by the two mount tabs and bolts on the bottom and either a bolt and spacer at the top or a push-on Tie-Wrap depending on your radiator choice. The smaller core thickness of the stock and aftermarket radiators can use the bolt and spacer method. Larger radiator cores may require using the Tie-Wrap method. Try the spacer-bolt method first.

You should have a minimum of about 1/2" clearance between the radiator and the A/C evaporator coil. Even though the evaporator coil is close to the radiator, the A/C fans are always turned on, pulling cool air through it.  Efficiency might be reduced a little in stop-and-go situations, but highway driving cooling should be normal.

Hardware Package G

  • The spacer and bolt method should be tried first for supporting the A/C evaporator coil. The spacer is a 1/2" thick, but may require being reduced for more clearances. Use a belt sander or hack-saw blade to reduce as needed. Support is only on the passenger side.

  • If the Tie-Wrap method is necessary continue with the following steps.
  • Push the Tie-Wrap threw the radiator between the two fans about 2 inches from the top as shown in Photo 10-C. The Tie-Wrap will go through both the radiator and evaporator coils.
  • Only one Tie-Wrap is used; a second Tie-Wrap is supplied as an extra.

  • Attach the foam pad and locking clip on the Tie-wrap as shown in Photo 10-C.
  • Pull the radiator and the A/C coils just enough to pull the evaporator coil against the rubber grommets. Do not over-tighten and place unnecessary stress on the radiator or evaporator coil.
  • Cut the remaining Tie-Wrap off after the installation.
Click on thumbnail image to see larger image in a new window
Photo 10-A: Package G hardware Photo 10-B: Install the supplied push-on type Zip-tie Photo 10-C: Install the supplied push-on type Tie-Wrap
 

Photo 10-D: Push Tie-Wrap through the radiator and the A/C cores

Photo 10-E: Install locking clip and pad  
Step 1: Removal Of Factory Parts Step 8: Installing The Power Steering Cooler
Step 2: Modifying The Radiator Brackets Step 9: Installing The Radiator
Step 3: Modifying The Radiator Cross Member Step 10: Installing The A/C Evaporator Coil To The Radiator
Step 4: Installing The I/C Mounting Support Panels Step 11: Installing The Intercooler Pipes
Step 5: Modifying The Evaporator Canister Step 12: Installing The Lower Radiator Panels
Step 6: Installing The Upper Radiator Shroud Panels Step 13: The Final Adjustments
Step 7: Installing The Intercooler Index: Introduction

©2004 Track Dog Racing™ All Rights Reserved