|
This modification is for
A/C equipped Miata's only. If you do not have A/C, skip this step
and continue on to Step 6. Depending
on the thickness of your radiator you may be required to bend the
upper A/C mounting tab and use the supplied Tie-Wrap setup in STEP
10. On stock radiators you can use the supplied spacer and bolt
to support the upper A/C evaporator coil.
5.1 Modify The
A/C Mounting Tabs
The upper mounting tab
on the front passenger side may need to be bent depending on your
setup for the A/C dryer tube for additional clearance.
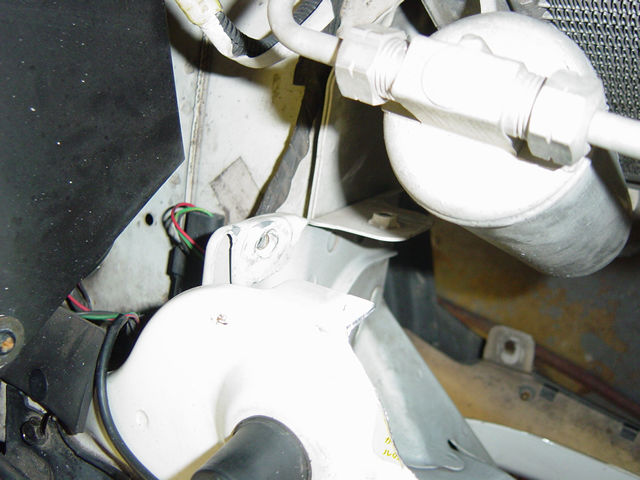
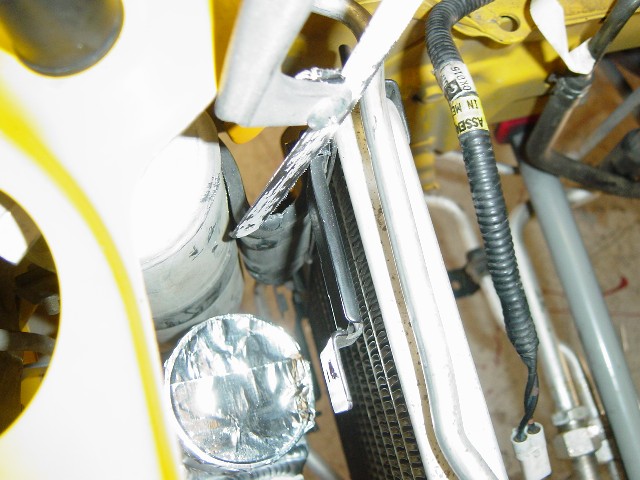
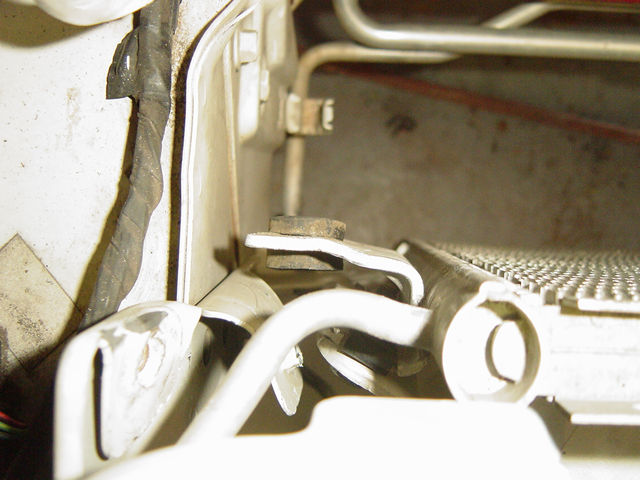
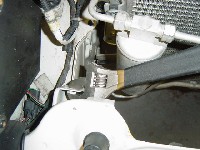
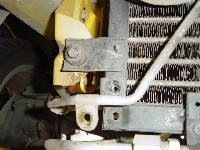
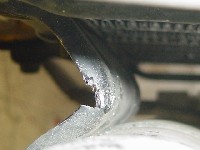
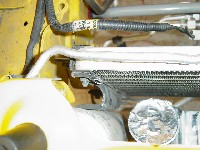
- Bend the upper radiator
tab on the passenger side close to flat or until there is enough
clearance for the A/C dryer tube as shown in Photo 5-D. This
tab bends pretty easily.
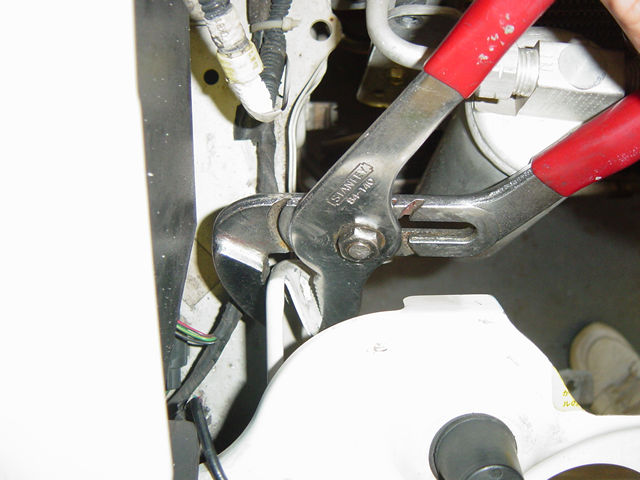
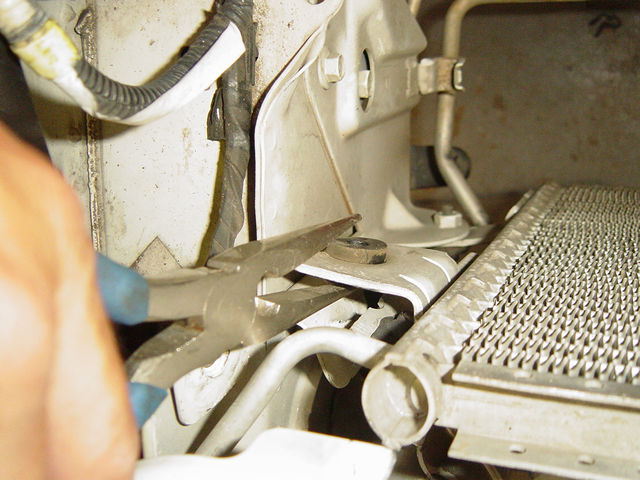
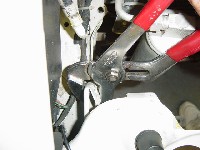
- Use a combination
of pliers and Crescent wrenches to push it over as shown
in Photos 5-A through 5-C .
Click on thumbnail
image to see larger image in a new window
 |
 |
 |
| Photo
5-A: Bend the upper tab |
Photo
5-B: Finish the bend of the upper tab using pliers |
Photo
5-C: Tab should be near flat |
 |
|
|
| Photo
5-D: Upper tab flat. Lower tab before bend |
|
|
5.2 Modify the
A/C Evaporator Coil Models 90-93
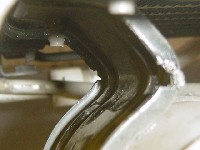
The A/C dryer canister
needs to be bent to allow clearance for the intercooler, take caution
when bending the A/C dryer and bracket. Section 5.3 shows details
using a Crescent wrench to aid bending.
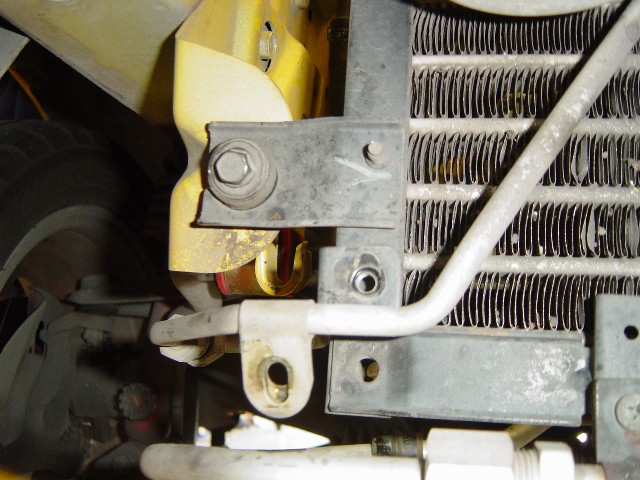
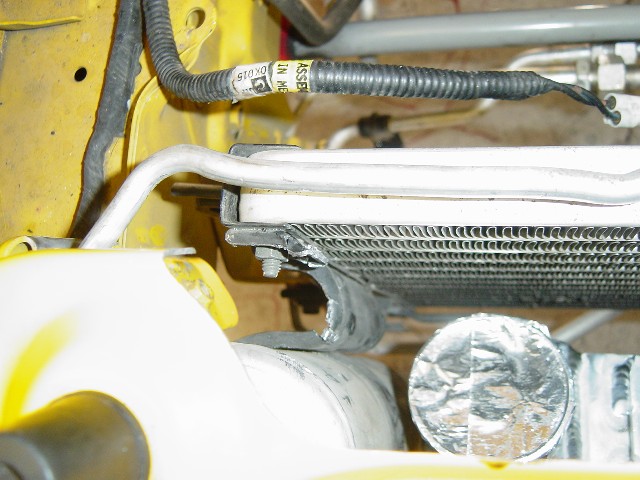
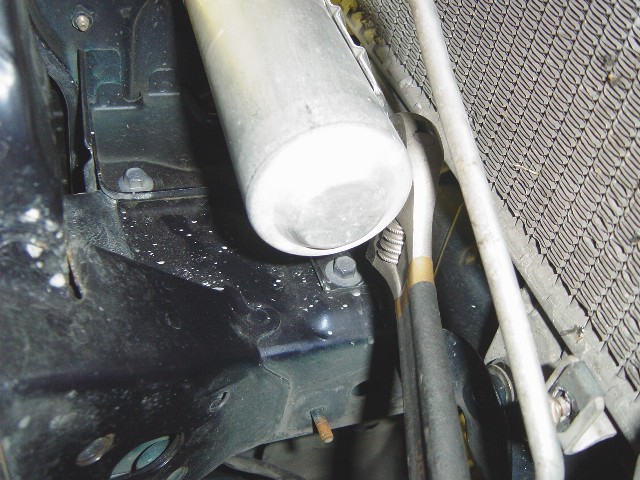
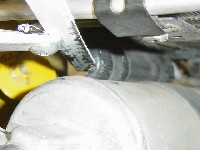
- Remove the 10mm bolt
holding the A/C tube as shown in Photo 5-E.
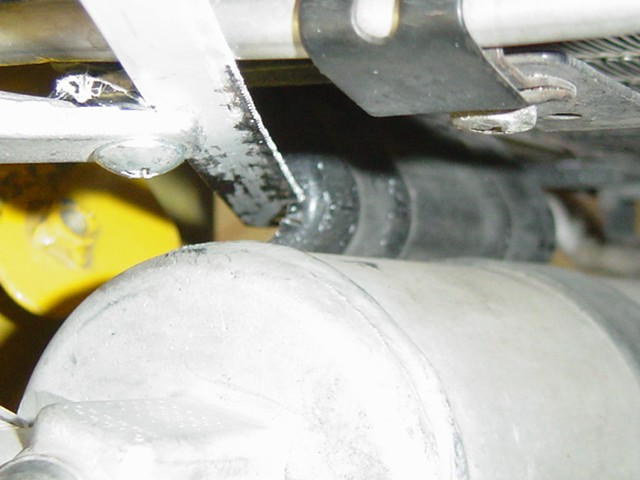
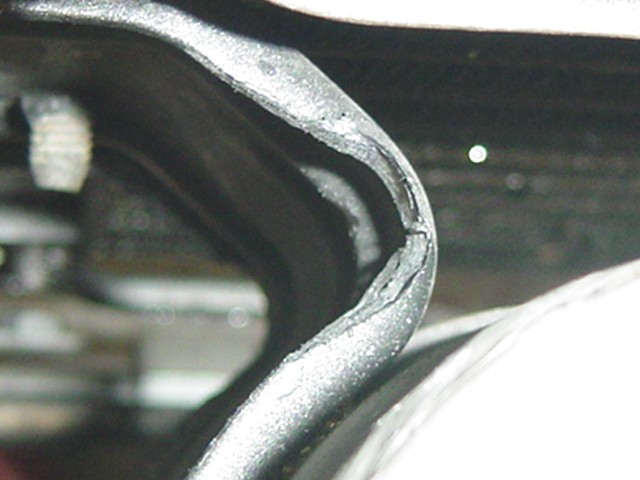
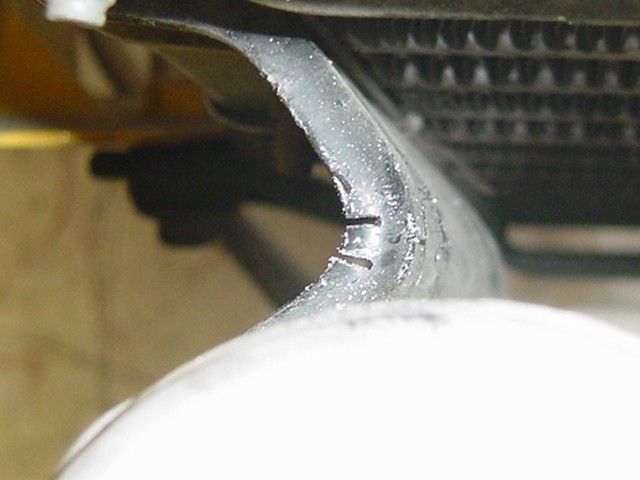
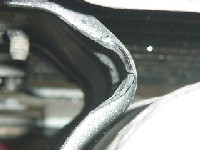
- Grind or Saw Cut
the A/C dryer bracket to increase bending radius as shown in
Photos 5-G through 5-J. Be sure to cut both top and bottom.
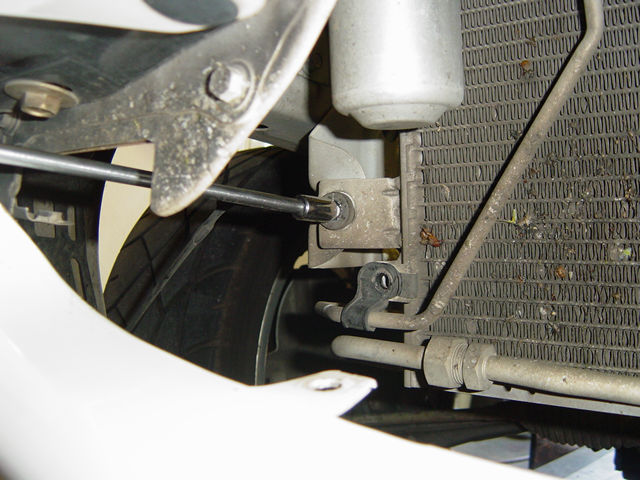
- Unscrew the bolt
holding the top A/C tube as shown in Photo 5-K.
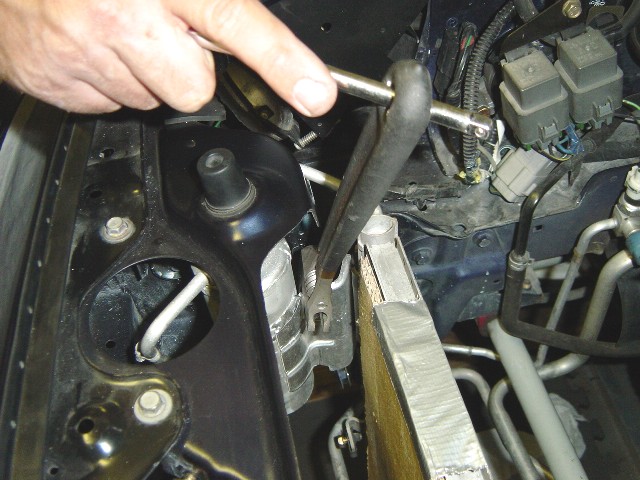
- Use a large Crescent
wrench and clamp it to the aluminum bracket as shown in Photos
5-O and 5-P.
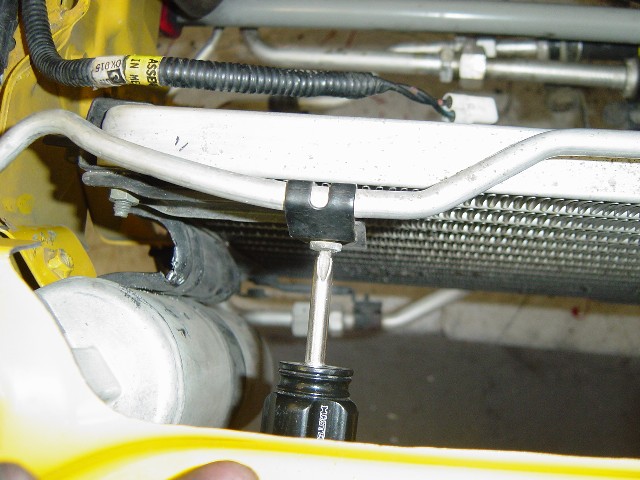
- Stick a screwdriver
through the hole at the end of the Crescent wrench for leverage
and rotate. The bracket will bend around.
- Rotate from the top
and bottom as you bend in small increments until the canister
has rotated a little less than 90 degrees.
- Don't overdo it.
Bend in small increments, making sure you don't damage anything.
You might have to go back and add a little more bend after the intercooler
is in place to get good clearance.
You do not want the A/C unit and the intercooler to rub.
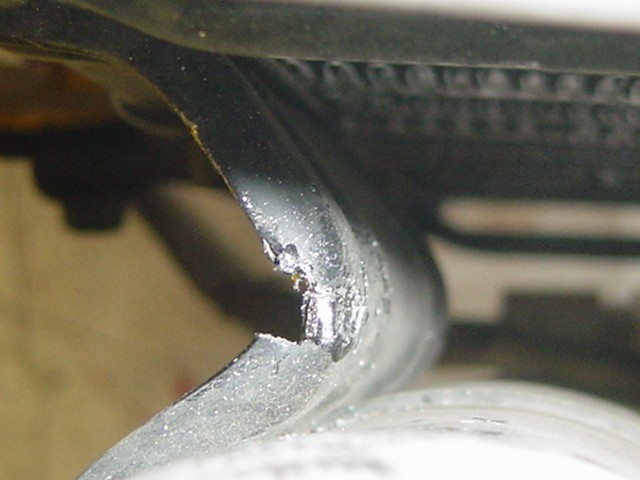
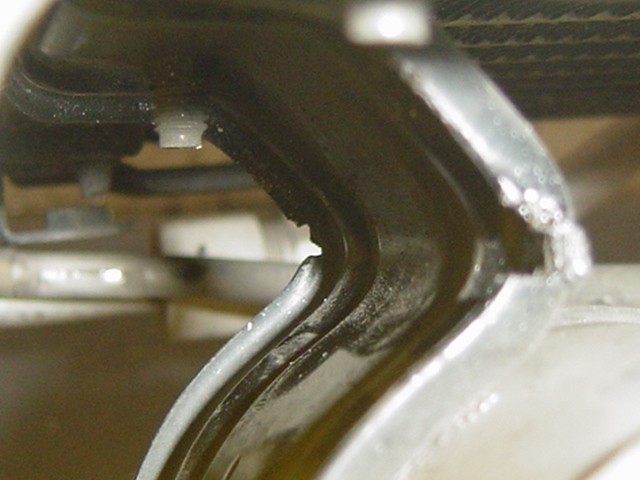
- Saw cut the bracket
as shown in Photos 5-L and 5-M for additional intercooler pipe clearance.
 |
 |
 |
| Photo 5-E:
Remove 10mm mounting bolt holding A/C tube |
Photo
5-F:Saw cut into bracket |
Photo
5-G: Grind upper and lower area in the bracket for bending |
 |
 |
 |
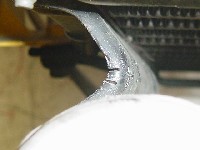
| Photo
5-H: Saw cut alternative into bracket |
Photo
5-I: Notch out saw cut |
Photo 5-J:Saw
cut bottom bracket |
 |
 |
 |
| Photo 5-K:
Unscrew top A/C tube bracket |
Photo
5-L: Saw Cut bracket to remove it |
Photo 5-M:
Bracket removed for pipe clearance |
5.3 Modify the
A/C Evaporator Coil Models 94-97
The later Miata had a different
A/C evaporator coil and dryer canister configuration, but bending
is similar. Take caution when bending this A/C dryer and bracket.
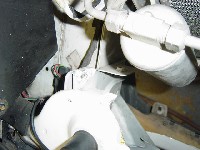
- Remove the 10mm bolt
holding the A/C tube as shown in Photo 5-N.
- Use a large Crescent
wrench and clamp it to the aluminum bracket as shown in Photos
5-O and 5-P.
- Stick a screwdriver
through the hole at the end of the Crescent wrench for leverage
and rotate. The bracket will bend around.
- Rotate from the top
and bottom as you bend in small increments until the canister
has rotated a little less than 90 degrees.
- Don't overdo it.
Bend in small increments, making sure you don't damage anything.
You might have to go back and add a little more bend after the intercooler
is in place to get good clearance.
You do not want the A/C unit and the intercooler to rub.
Click on thumbnail
image to see larger image in a new window
|
|
|
|
| Photo
5-N: Remove 10mm mounting bolt holding A/C tube |
Photo
5-O: Use a Crescent wrench to bend the bottom of the bracket |
Photo
5-P: Use a Crescent wrench to bend the top of the bracket |
|
|
|
|
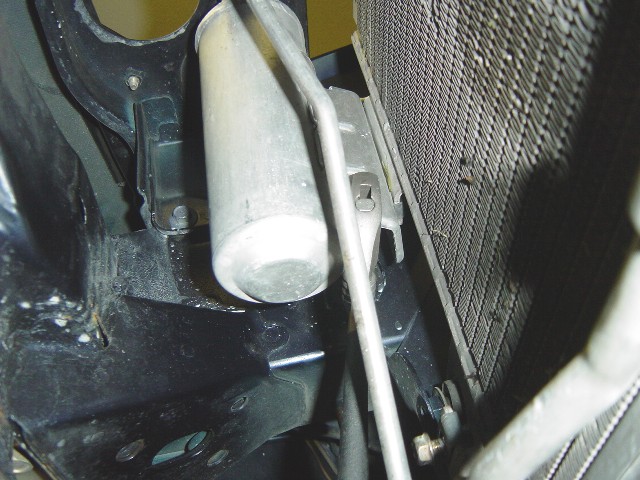
| Photo
5-Q: A/C dryer should look similar to this photo when bent |
Photo 5-R: Top view of bent A/C dryer |
|
5.4 Modifying the
A/C Evaporator Coil Upper Brackets
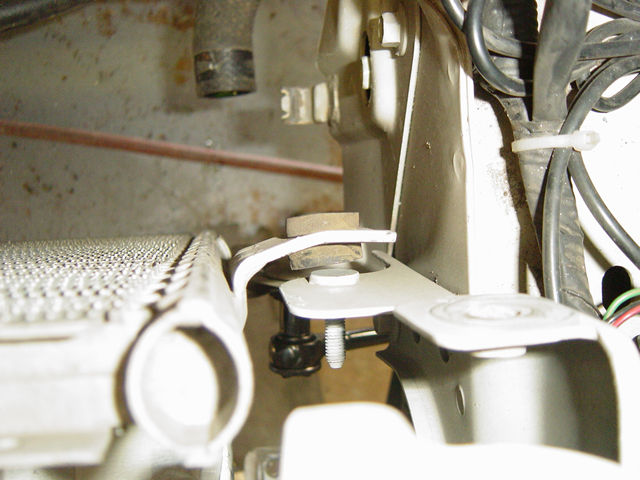
The condenser coil is supported
using the lower support brackets in the factory position and either
a mounting bolt and spacer or a Tie-Wrap setup for the upper half.
In STEP 10 we will complete the upper support
for the evaporator coil.
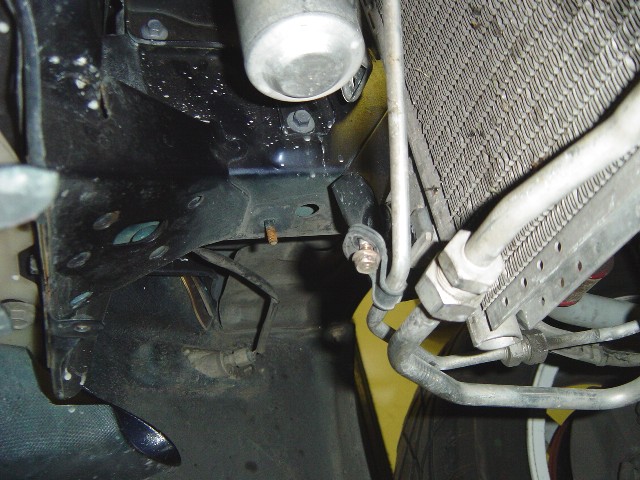
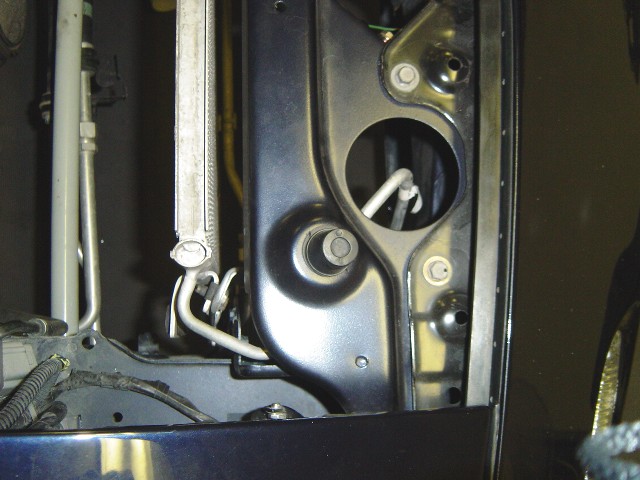
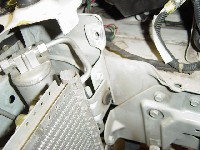
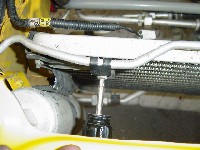
- If the the A/C
evaporator coil lower hardware was removed, reinstall in
the factory position as shown in Photos 5-F and 5-S. using factory
hardware.
- Mount the evaporator
coil toward the front side of the frame bracket as shown
in Photo 5-S.
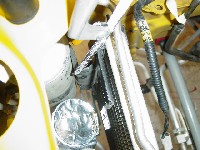
- Bend the upper tabs
at an increasing angle toward the engine to act as a stand-off.
Bend the tab back flat as shown in Photos 5-T and 5-U to increase
surface contact against the radiator. You should have approximately
1/2" or more space between the radiator and the condenser coil
when complete.
Click on thumbnail
image to see larger image in a new window
|
|
|
|
| Photo
5-S: Attach the evaporator coil to the lower frame tabs |
Photo
5-T Bend the upper tab toward the engine |
Photo
5-U: Bend the tab back flat to increase surface contact |
|
|
|
|
| Photo
5-V: Bend the tabs to get approximately 1/2" of space |
|
|
|