Step 1 - Removal of Factory Parts
 

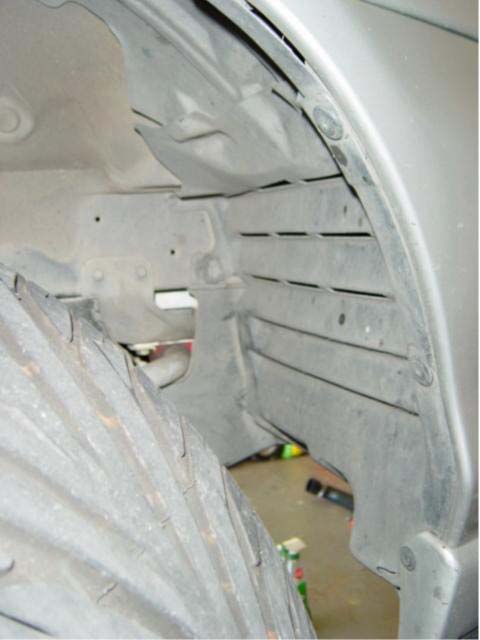
The TDR intercooler instructions assume that the factory power steering and air conditioner are in place and that the factory shipping tie-down hooks that are located in the radiator area are removed. If the tie downs have not been removed you can go to www.miata.net and use this link to get instructions on how to remove them.

Drive your car onto a level surface, put the car in gear, apply the parking brake and block off the rear wheels. Jack the front of the car up and put the car up securely on jack stands. Remove both front wheels.

1.1 Splash Pan and Fender Liner Removal: Remove the factory belly pan and right and left wheel well liners. These will be reused. The bolts are mostly 10mm and the plastic snaps undo with either a Phillips or flat-head screwdriver.

Click on thumbnail images to see larger image in a new window

 Photo 1-A: Fender liner

 Photo 1-B: Splash pan

 Photo 1-C: Front spoiler lip

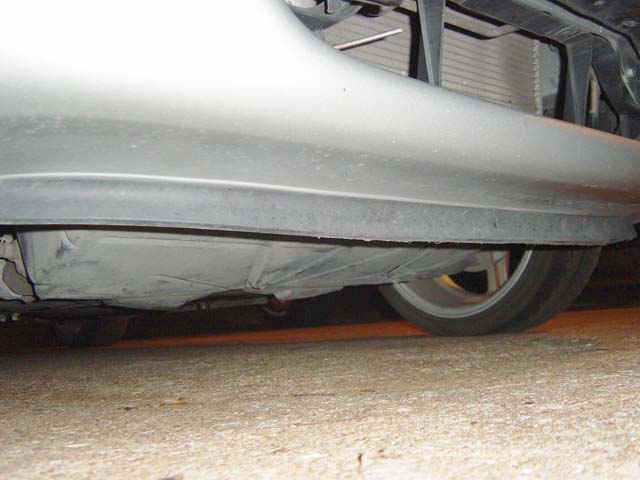
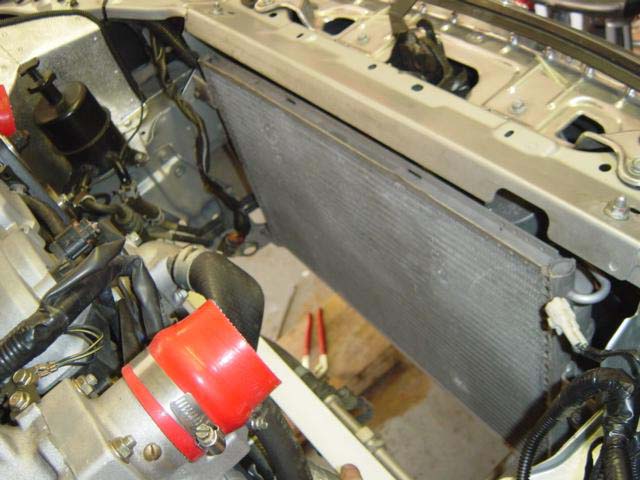
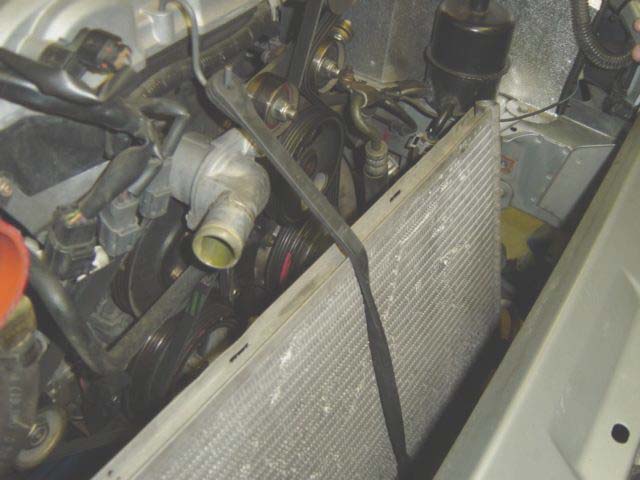
1.2 Front Spoiler Lip Removal: Under the front bumper is a small spoiler lip that has to be removed. It is held on by 5 screws that will be used later to attach a new replacement panel.

1.3 Radiator Removal: If the radiator fluid is still good, drain it into a container for reuse. (Caution: The radiator fluid could be hot and burn your skin. Radiator fluid is toxic so keep the fluid away from pets and children.)

  • From below the car: Remove the radiator drain plug.  After the radiator fluid begins to drain, remove the radiator cap to let the fluid drain more quickly.  Disconnect the lower radiator hose and have a catch can handy because radiator fluid will be leaking out from the hoses. Using a 10mm socket, remove the bolt that holds the bracket for the A/C pipes as shown in Photo1-E.
     
  • From above the car: Remove existing crossover tube if it is still in place. Push small rags into the SC and TB openings to make sure metal filings don't get into the engine. Remember to remove the rags before installing the intercooler tubes! Remove the two 14mm nuts that hold the radiator brackets in place.  
     
  • Disconnect the upper radiator hose from both the radiator and thermostat housing. This will be trimmed in a later step before reattaching. Disconnect the radiator overflow hose and the two power connections for the radiator fans.
     
  • Once everything is disconnected, lift the radiator out and place it in a safe location.
     
  • Remove the two 10mm bolts from the two black brackets that hold the A/C condenser in place, as shown in Photo 1-G.
  • Gently pull up on the condenser to remove it from the lower mounts, then push it gently towards the engine being careful not to damage the unit. Use a bungee cord or similar strap to gently hold back the A/C condenser coil out of the way. 
  • Leave the rubber grommet on the condenser coil, but remove the metal insert.
     
  • Remove the factory horn. You can reinstall it after the Intercooler is installed.
Click on thumbnail image to see larger image in a new window
Photo 1-D: Lower radiator Photo 1-E: A/C bracket Photo 1-F: Radiator removed
 
Photo 1-G: A/C condenser coil bracket Photo 1-H: A/C strapped back  

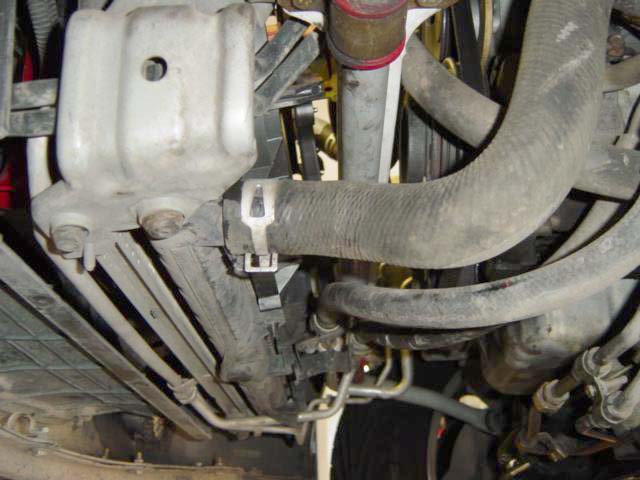
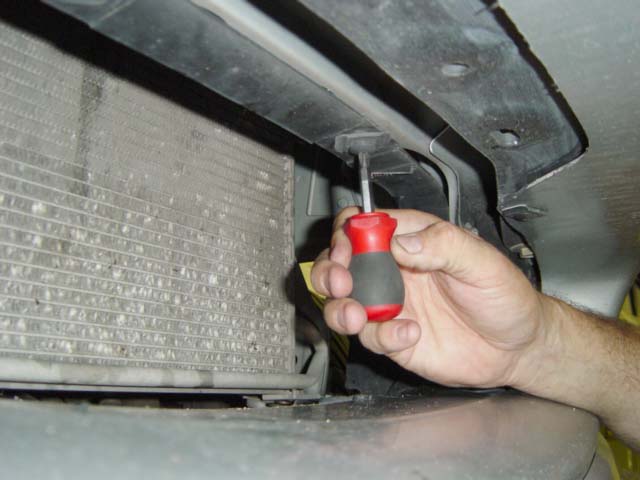
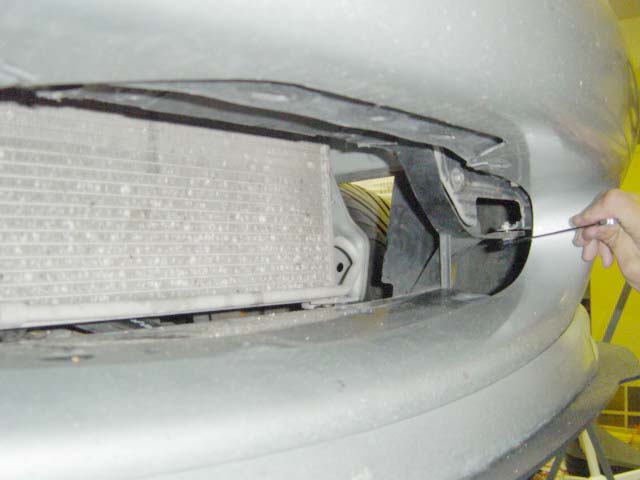
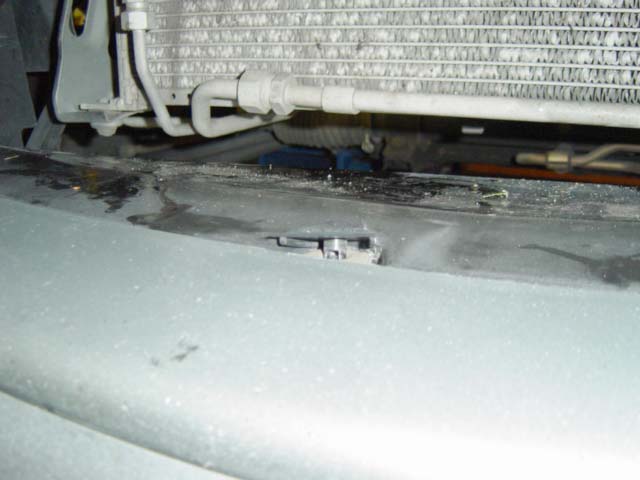
1.4 Front Intake Cowling Removal: Remove the plastic surround/cowling in the mouth of the car. It will be replaced by new ABS plastic pieces.

  • There are several plastic screw clips that hold this piece in place. When all the screws, clips, nuts and bolts are removed, pull the cowling unit out through the bottom of the car.
     
  • Using a hacksaw blade, cut away the two metal tabs that are blocking the opening as shown in Photo 1-O. They serve no purpose. A single-ended hacksaw works best, but a Jig-Saw will work as well. The photo indicates the portion of the cut with a red dashed line.

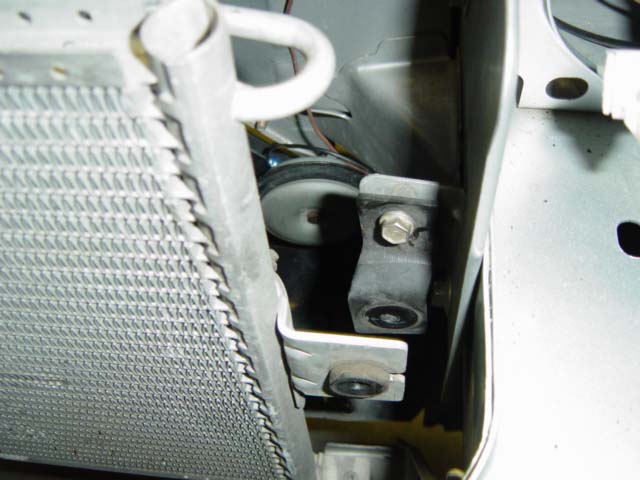
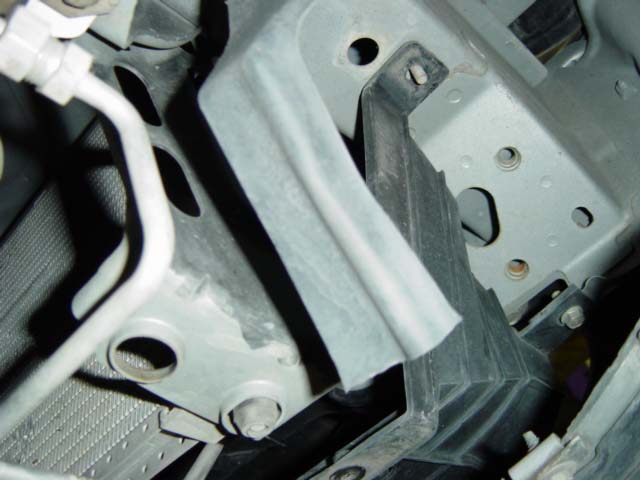
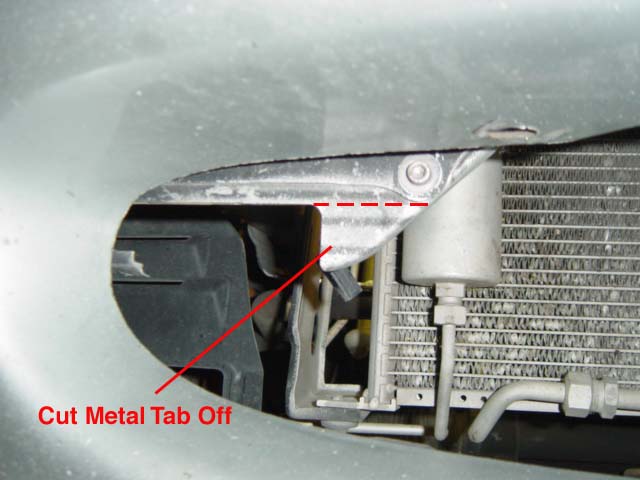
OPTIONAL

The 3 tabs on the bumper as shown in Photo 1-P that the cowling was attached to can be cut off for appearance. If reinstalling the cowling in the future the tabs do not affect the integrity of the mounting.

  • Cut away the three plastic tabs that were holding the cowling in place as shown in Photo 1-P.
Click on thumbnail image to see larger image in a new window
Photo 1-J: Remove plastic screws Photo 1-K: View from underneath Photo 1-L: Stud holding cowling in place
Photo 1-M: Undo bolts  Photo 1-N: Remove clips  Photo 1-O: Hacksaw metal tab off
 
Photo 1-P: Cut off plastic tabs    

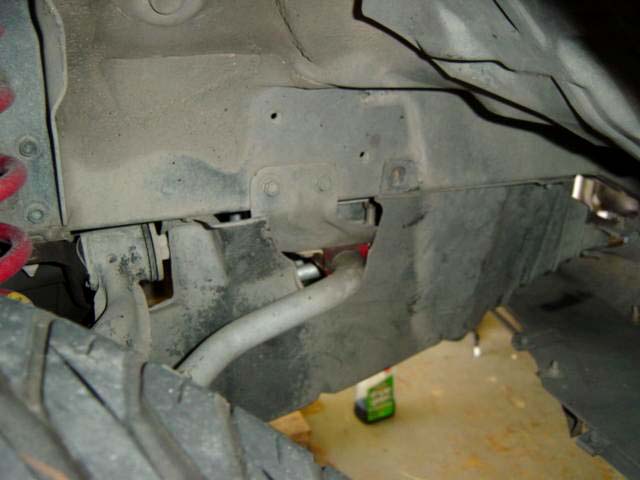
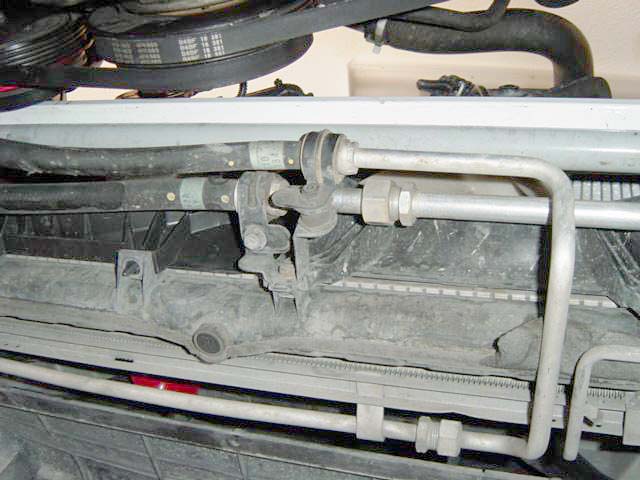
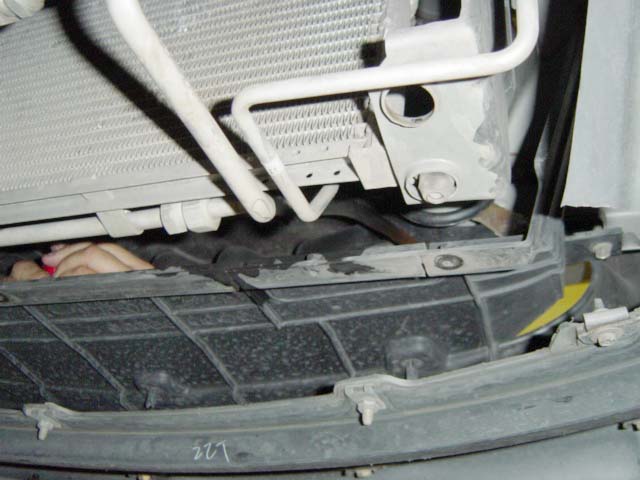
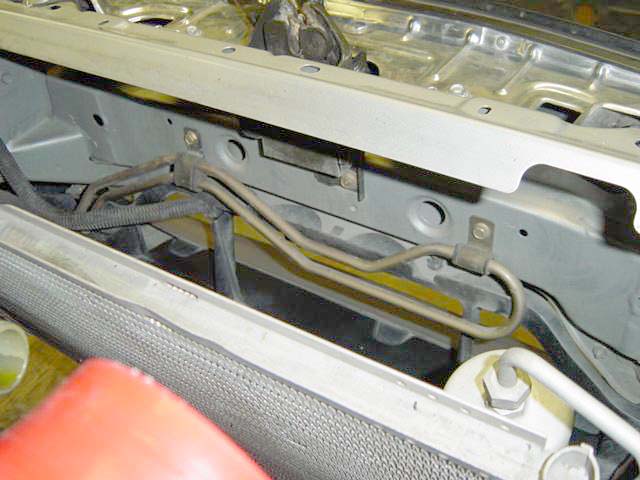
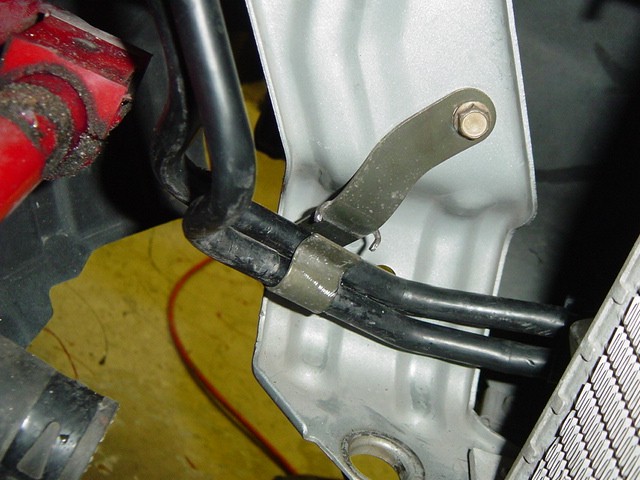
1.5 Power Steering Cooler Removal: If you have power steering you'll see the cooling pipe that needs to be removed. This will be modified later on.

  • Remove the two 10mm bolts that hold the cooling pipe in position as shown in Photo 1-Q.
  • Remove the 10mm bolt that holds the side bracket to the radiator support as shown in Photo 1-R (Note: Photo 1-R shows the P/S bracket partially removed from the cooling tube, this is not to be removed at this time).
     
  • Set the cooling tube a side where it will be modified in STEP 8 of the installation.
  Click on thumbnail image to see larger image in a new window

Photo 1-Q: Remove P/S cooling tube

Photo 1-R: Remove P/S side bracket from the radiator support  
Step 1: Removal Of Factory Parts Step 8: Installing The Power Steering Cooler
Step 2: Installing The Radiator Brackets Step 9: Installing The Radiator
Step 3: Modifying The Radiator Cross Member Step 10: Installing The A/C Evaporator Coil To The Radiator
Step 4: Modifying The Evaporator Canister Step 11: Installing The Intercooler Pipes
Step 5: Installing The I/C Mounting Support Panels Step 12: Installing The Lower Radiator Panels
Step 6: Installing The Radiator Shroud Panels Step 13: The Final Adjustments
Step 7: Installing The Intercooler Main Page

©2004 Track Dog Racing™ All Rights Reserved