|
The radiator is now positioned
lower and angled back a little toward the engine. Depending on
the type of radiator you are using, the plastic support arms for the
fans might need to be trimmed to clear the sway bar. The stock radiator
does not require additional trimming. Some aftermarket radiators such
as the FM, PWR and Koyo will require trimming. If you are using
a Koyo radiator with the Racing Beat Sway Bar Brace you will have to
discontinue using the brace member or modify it for clearance. To modify,
you can cut out the side of the RB brace member where the fan support
was touching and then use plumbers epoxy putty to fill out the cut.
You can, however, still use the hardware block support in the frame
bracket which will add some additional sway bar support.
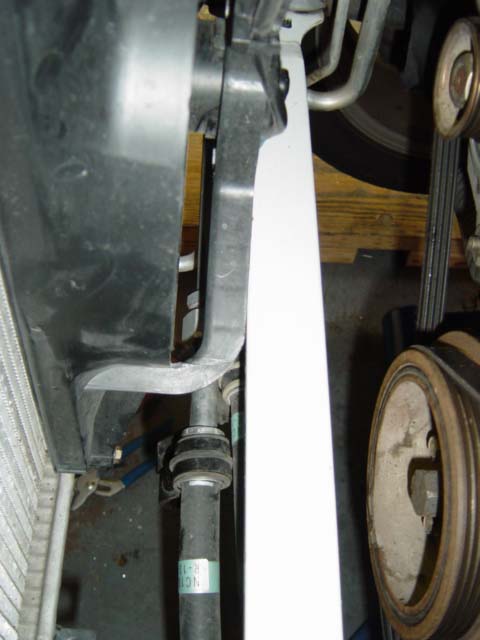
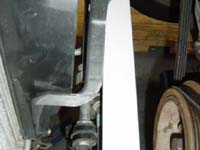
Photos 9-B through 9-E show
how much was trimmed away from one of our test vehicles with a Koyo
radiator. The fan motor braces use a very strong plastic allowing considerable
amount of plastic removal. Just don't overdo it!
Hardware Package
F
Note: This is an
important step to installing the radiator properly. When installed correctly,
the black textured aluminum radiator cover should
match close to the rubber supports on the top of the radiator without
having to move the radiator very much. If not, readjust.
- Insert the A/C
condenser into the front holes of the lower radiator bracket,
then slide the radiator into place, making sure it seats into the
lower brackets firmly. Make sure the rubber grommets that were on
the bottom of the radiator are in place. If the fan supports will
not reach the bottom, mark your braces and trim as needed. Use a Dremel
or jig saw to cut away the plastic.
- Attach the silicone
rubber hoses to the Intercooler and insert the two Intercooler
pipes. Place them into the connectors with the ends turned in towards
each other out of the way. Check how the radiator fits and if the
radiator fan braces are binding on the sway bar. Mark the areas that
needs trimming. Keep test-fitting the radiator until it slides in
without rubbing the sway bar.
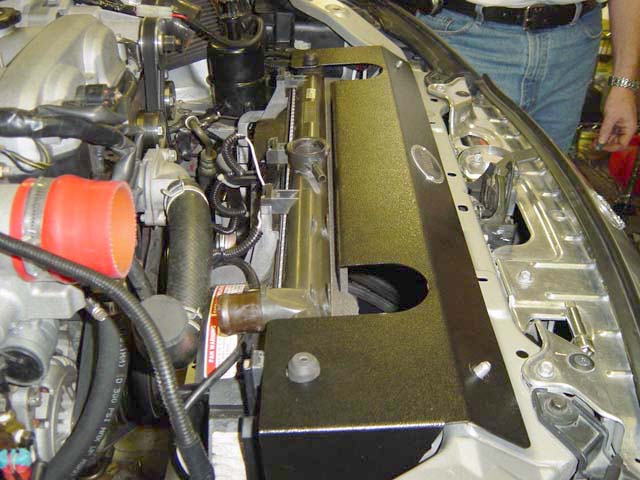
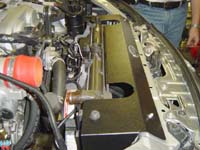
- Remove the Intercooler
pipes and install the black textured aluminum radiator cover for
the final test fitting, as shown in Photo 9-E. Install over the rubber
supports on top of the radiator and the threaded studs on the frame
that will hold the shield in place. Trim the fan support braces if
necessary and refit.
- Once the clearances
are sufficient, attach the lower radiator hose to the bottom outlet
of the radiator. Reattach the 10 mm bolt to the bracket that secures
the A/C plumbing on the bottom of the fan housing.
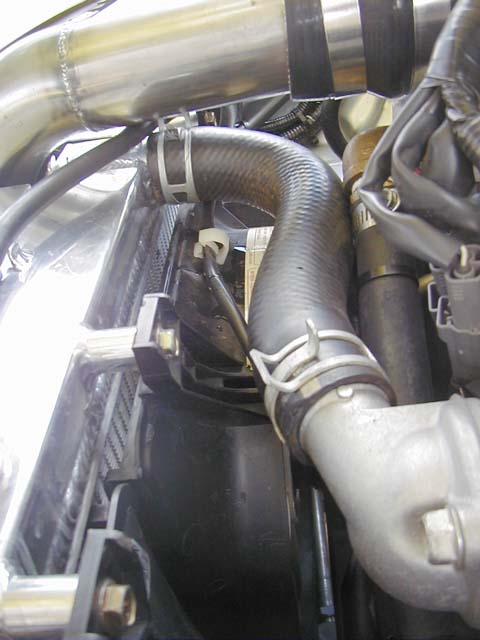
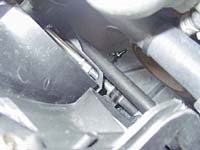
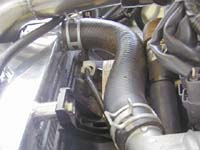
- The upper radiator
hose requires removal of about 1 3/4" at the radiator end.
Lay the hose on top of the radiator fittings and cut as required,
as seen in Photo 9-F. Attach the radiator hose using original factory
clamps or the new clamps supplied in Package F. Attach the overflow
tube.
- Make sure the radiator
drain is back in place and all hoses are connected. Refill the
radiator with fresh fluid or reuse your drained fluid. Check and make
sure there are no leaks in the radiator cooling system.
Click on thumbnail
image to see larger image in a new window
 |
 |
 |
| Photo
9-A: Radiator shroud before modification |
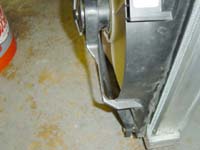
Photo
9-B: Radiator shroud cut to fit sway bar |
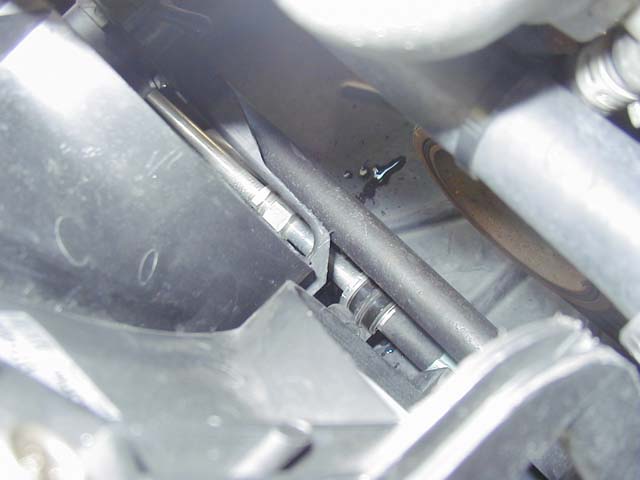
Photo
9-C: Radiator shroud cut |
 |
 |
 |
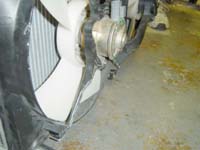
| Photo
9-D: Radiator shroud cut |
Photo
9-E: Check for proper fit with radiator cover in position |
Photo
9-F: Radiator hoses cut to length |
|