|
Before installing the Intercooler,
run clean water through it to make sure there are no foreign objects
in it. Shake out any water that may be left. The Intercooler does not
have to be completely dry, but remove any excess water. Tape off using
masking tape or some other tape that will be easy to remove and not
leave glue behind.
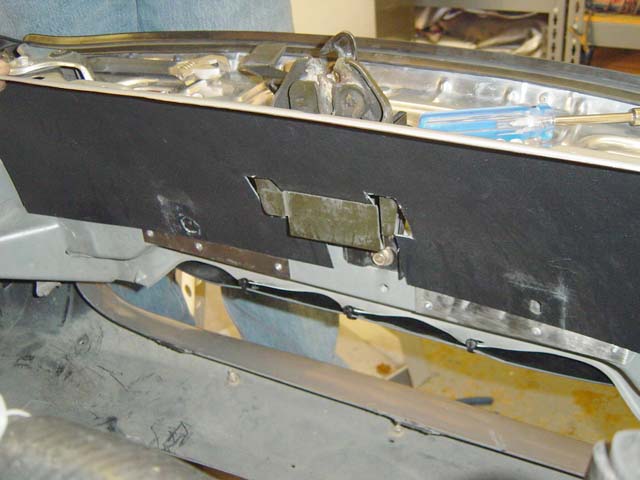
The TDR Intercooler is supported
by two brackets using the mounting locations where the factory power
steering cooler pipes used to attach to the car. Some photos below are
shown with the A/C evaporator coil removed for photo purposes only.
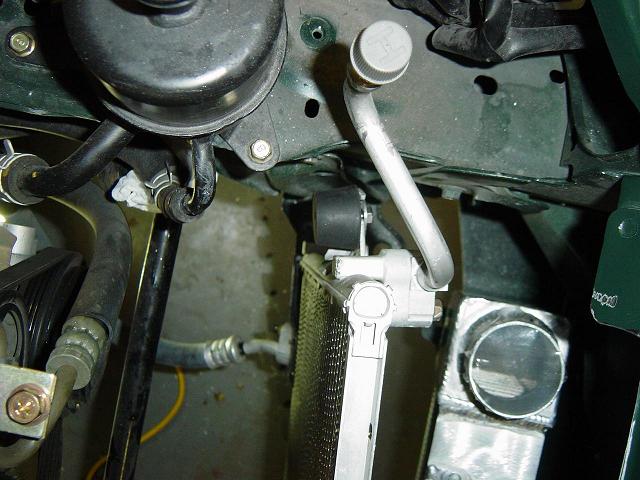
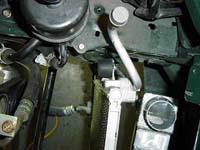
The 2001-2003 model with
air conditioning requires that you offset the intercooler about 1/8"
toward the passenger side. This will add additional clearance from the
A/C evaporator filler tube as shown in Photo 7-E.
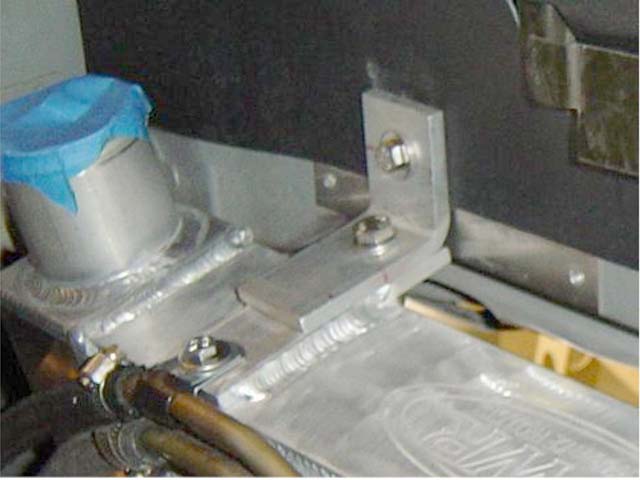
Hardware Package
C and D-2
- There
are two aluminum L-brackets using two 13 x 30 mm long bolts, washers,
lock washers and nuts in Package D-2. Attach the L-brackets
onto the top of the Intercooler and hand tighten.
- Pull the A/C condenser
coil back toward the engine. A bungee cord may help with this
step.
- From the top, insert
the Intercooler between the A/C evaporator coil and the sub frame.
Be careful not to scratch the finish.
- Using the two
10 x 25 mm long bolts and washers
from Package C, mount the intercooler into position with the plastic
panel between the intercooler brackets and the sub frame, as shown
in Photo 7-B. Hand-tighten the bolts. Make sure the L-brackets
are straight on the Intercooler and then firmly tighten the 13 mm
bolts first, followed by the 10 mm bolts in the sub frame.
- If you need more clearance
from the condenser canister, refer back to STEP
4 on how to proceed in bending the A/C dryer unit.
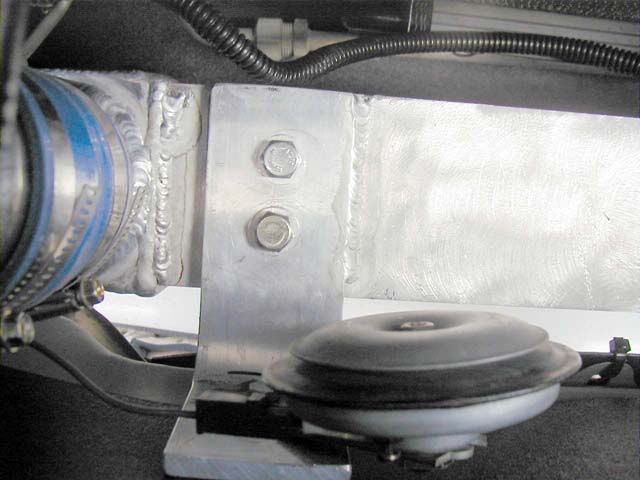
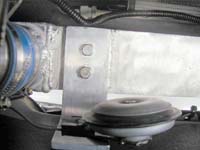
- Note: The factory horn
can be relocated to the passenger side intercooler bracket bolt
as seen in Photo 7-C. Install this last. If you use aftermarket horns
you'll need to decide where they will work best for you. A common
mounting area is the front fender well area behind the bumper.
Click on thumbnail
image to see larger image in a new window
 |
 |
 |
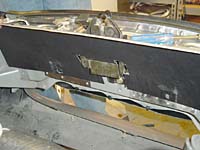
| Photo
7-A: Intercooler mounting location |
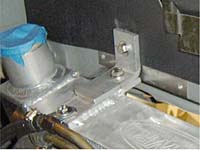
Photo
7-B: Intercooler mounting bracket |
Photo
7-C: Factory horn mounting location |
 |
|
|
| Photo
7-D: 2001+ models A/C to intercooler clearance modification |
|
|
|