| If your
car has power steering you'll have to modify the factory cooling tube.
There are two options for modifying the power steering cooling tube.
The first option requires draining the fluid, cutting the cooling tube
and installing flexible hose to the reservoir. This method is a little
messier, but straight forward. The second option requires more patients
by bending the tubes to a new location and requires you to test fit
the Intercooler several times to check for clearances. A pipe bender
is supplied with the kit to ease installation. If your car does not
have power steering, move on to STEP 9.
For BRP Turbo application
go to Section 8.3. In the BRP turbo application the power steering reservoir
will be moved and requires the power steering tubing to be modified
in Section 8.1.
Hardware Package
E
8.1 Power Steering
Cooler Tube Modification-Option
1
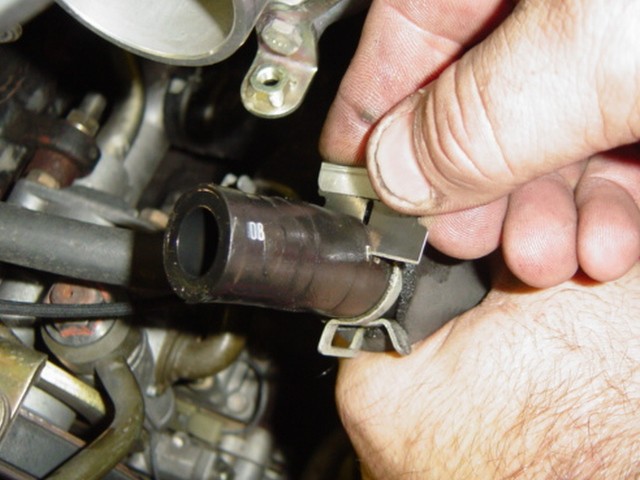
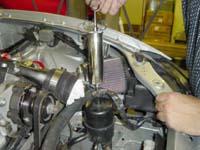
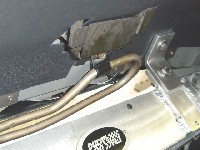
- Drain the fluid from the PS
reservoir using a Mighty Vac or similar siphon pump as shown in Photo
8-A.
- Leave the short section of rubber
hose that is connected to the reservoir and the cooling pipe as
seen in Photo 8-C, it will be used on the reinstallation. Remove one
hose from the drained canister and suck up any excess fluid in the
lines. It's best if you tap these lines off so they don't continue
to leak fluid.
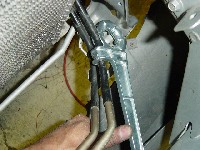
- Remove the two mounting
brackets as seen in Photos 8-B. Use a flat head screwdriver
to bend open the passenger side clamp and remove. The clamp and rubber
insert will not be reused. Use a pair of pliers to bend back the tabs
off the double tube bracket. Save the rubber insert as it will
be installed as a bumper after the tubes are cut, as seen in Photo
8-F.
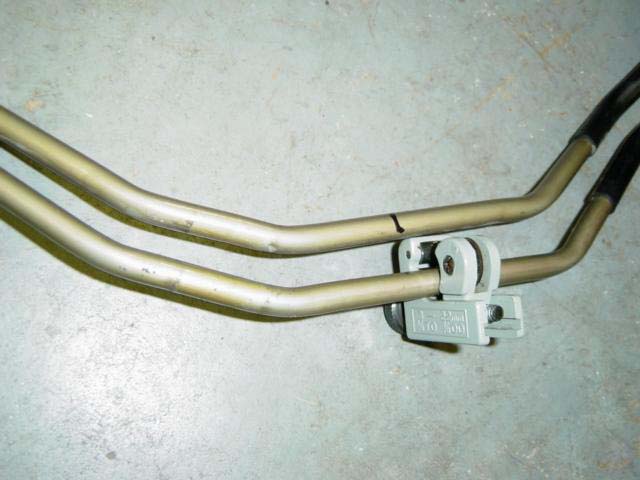
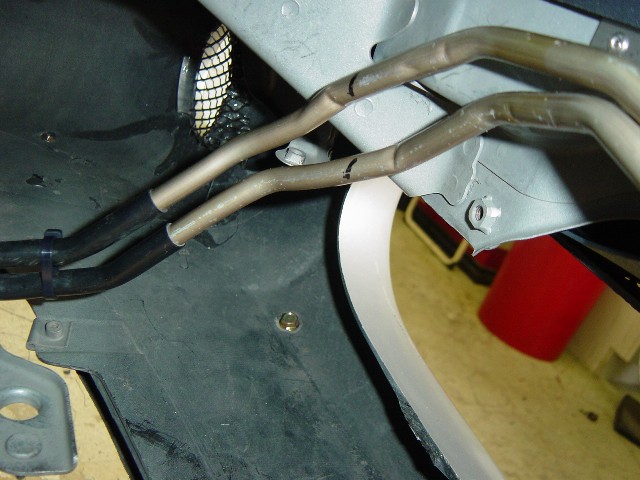
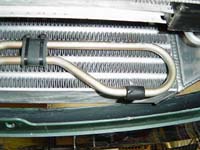
- Draw two cut lines,
offset about an inch as seen in Photo 8-C. Also view Photo 8-G
to get a good view to where to cut the pipe. Use a plumber's tube
cutter to cut the two tube ends off and discard. Be sure there are
no burrs on the tube. If you suspect metal shavings or other foreign
materials have entered the tube, be sure to clean it out before installing.
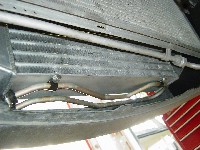
- The double tube rubber
insert that was removed from the stock mounting bracket should
now be mounted, as shown in Photo 8-F. Use a Zip-Tie to hold
it in place. The rubber stop helps cushion the P/S cooler from
making contact.
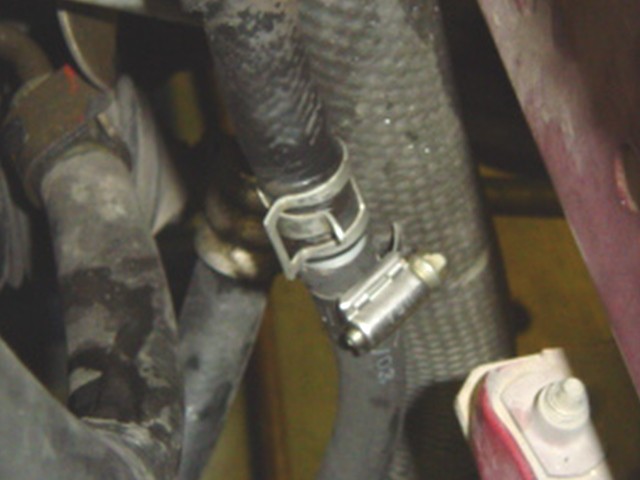
- Attach the cloth
covered rubber hose over the P/S tube about 1.5 inches and
secure it with the supplied clamps. Applying a little bit of P/S oil
to the hose or tube will help in the install. Leave the rubber
hose as a loop, one piece. It will be cut to length after the P/S
cooler is installed.
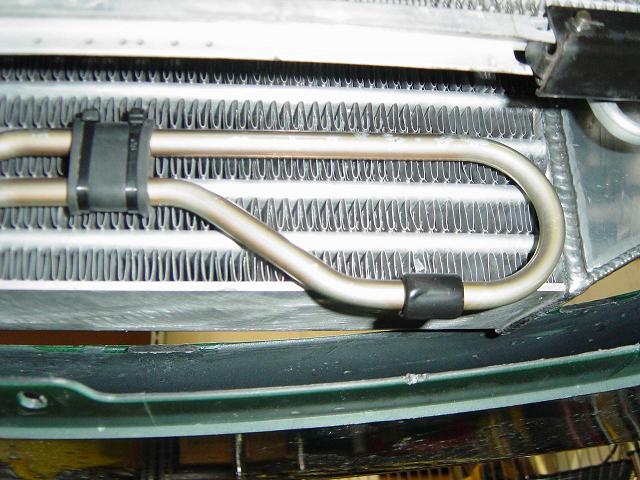
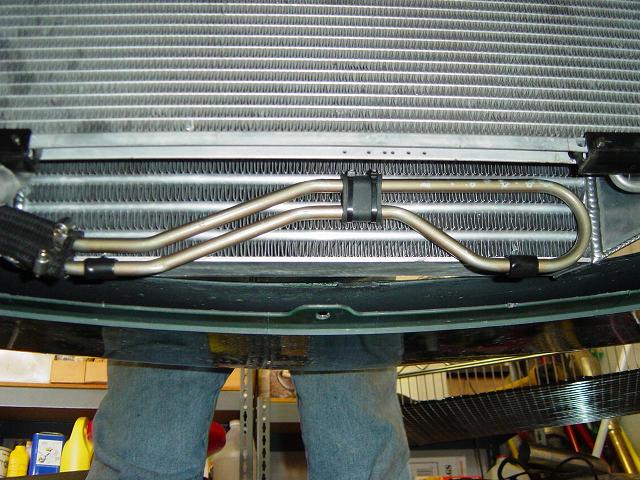
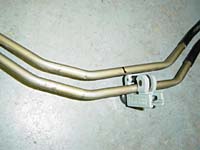
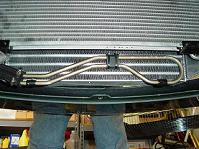
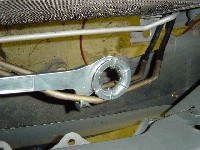
- Mount the two
new P/S cooler mounting brackets on to the cooling tube as
shown in Photos 8-E and 8-F.
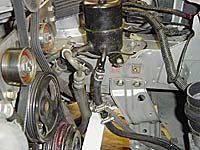
- Install
the modified power steering cooling tube. Depending
on your year model it might be better to install the cooling tube
on the bottom for more clearance with the A/C condensor as shown in
Photos 8-G and 8-H. Use the 10 x 12.5 mm long bolts and washers from
Package E. Do not over tighten as the tapped threads in the intercooler
will strip out easily. Add a little Lock-Tit would be helpful.
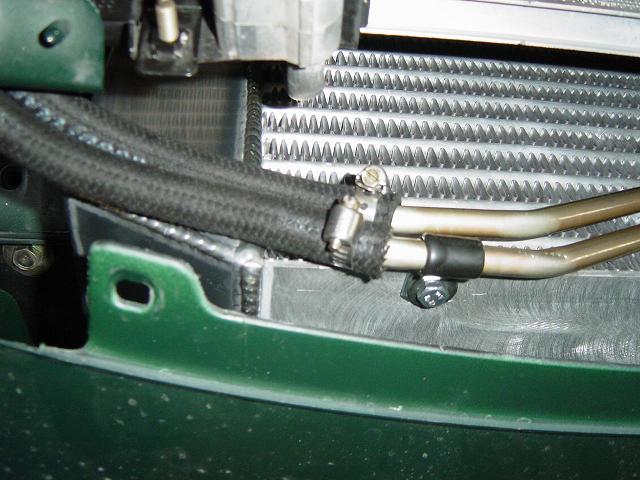
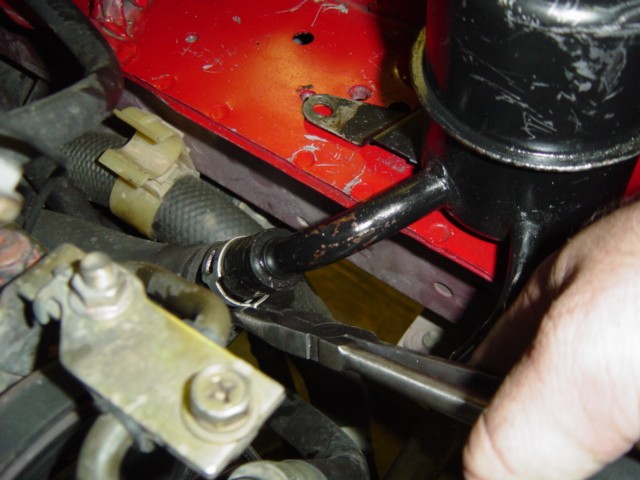
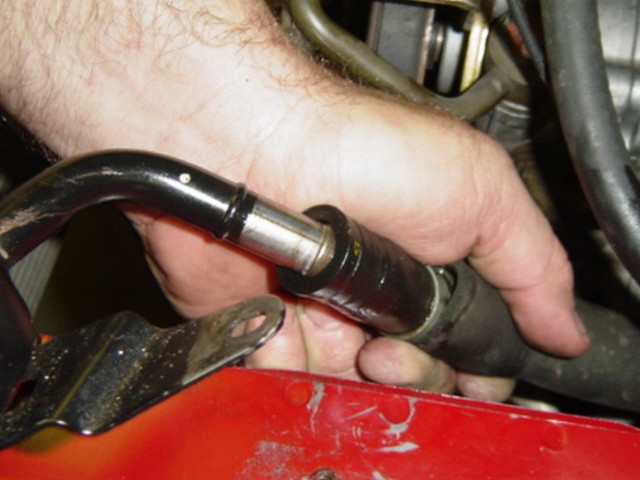
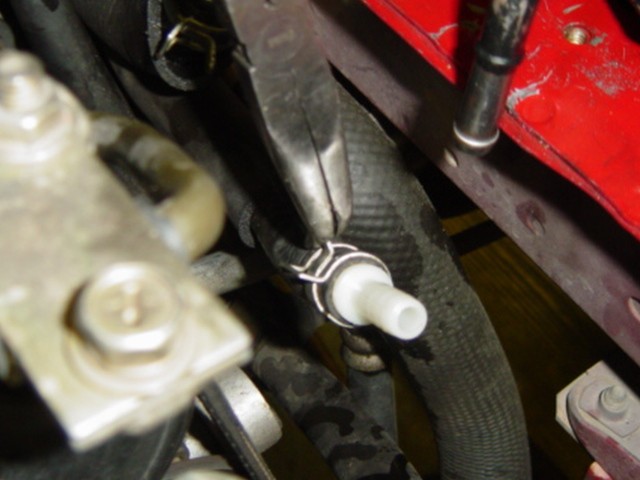
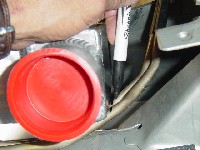
- There are two 3/8"
hose couplings in Package E that will attach the new hose to the
existing P/S hoses. Insert one into the return line and one into the
factory short hose that is attached to the P/S reservoir with and
secure with the supplied clamps as shown in Photo 8-D. Use some P/S
oil if necessary on the coupling to help insert it into the hose.
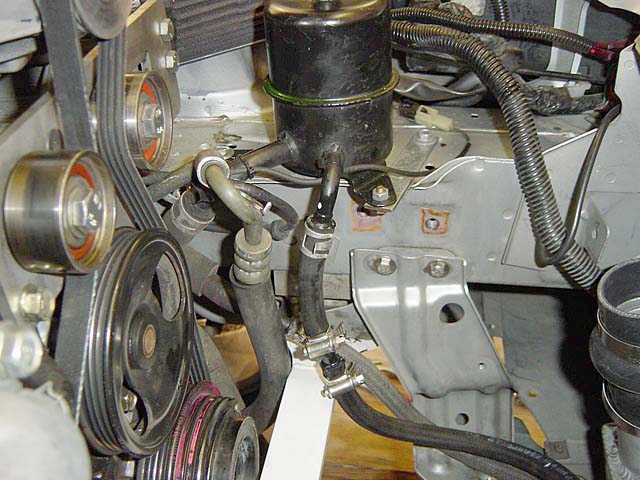
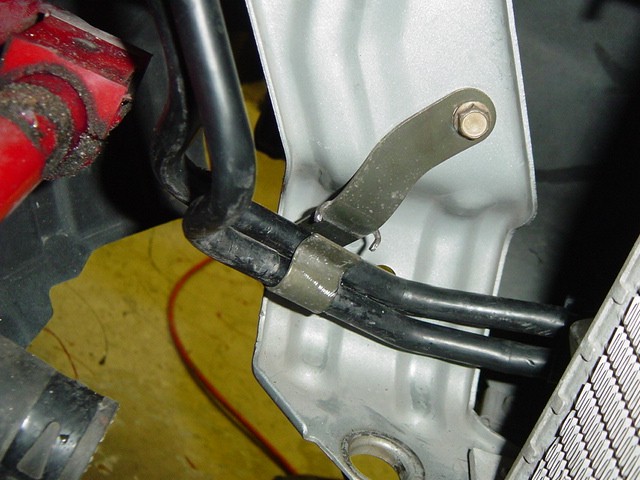
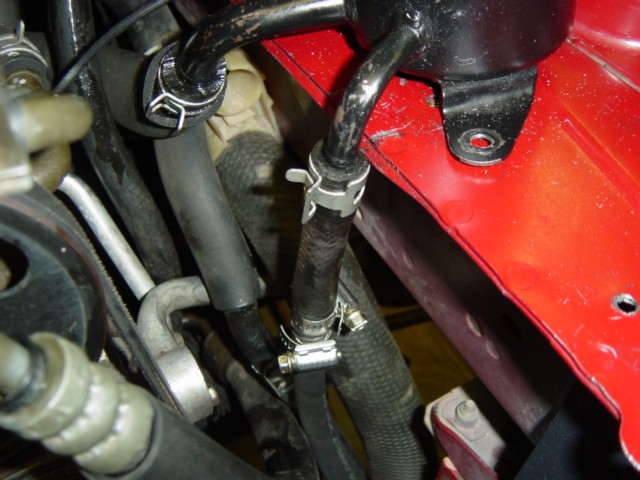
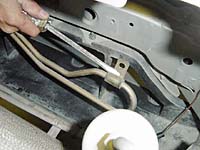
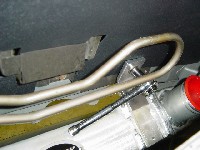
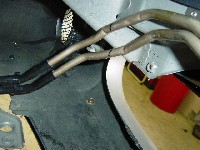
- Run the P/S hoses down
next to the radiator support bracket as shown in Photo 8-D.
The new plastic side panel is removed only to show the placement of
the P/S hoses in relation to the radiator bracket. Measure the hoses
to the proper length and using the supplied clamps, attach them to
the hose couplings. Again, a little bit of P/S oil will help in attaching
the hoses to the couplings.
- Fill the P/S fluid
reservoir with power steering fluid and you're done with this
step. You may notice a little bit of jerking in the steering until
all the air has escaped from the system. Be sure to check the fluid
again after the P/S pump has had a chance to recirculate.
Click on thumbnail
image to see larger image in a new window
 |
 |
 |
| Photo 8-A: Remove P/S fluid |
Photo 8-B:
Remove tube bracket |
Photo 8-C:
Plumber's tube cutter |
 |
 |
 |
| Photo
8-D: Hose connection at the P/S reservoir |
Photo
8-E: Hoses attached to the power steering cooling tube |
Photo
8-F: Power steering tube attached to the back isde of the I/C |
 |
 |
|
| Photo
8-G: Rear attachment on '01-05 model |
Photo
8-H: Optional attachment on '99-00 model |
|
8.2 Power Steering
Cooler Tube Modification-Option
2
The
power steering tube can also be bend to clear the intercooler. I do
not prefer this method as the tube is very hard to bend. You will be
require to remove and reinstall the Intercooler several times during
the fitment. Remove using the 10 mm bolts in the frame mount. The tubes
do not bend easily with your hands so use the pipe bender supplied when
necessary. Clearances should be about a 1/4" from the Intercooler
tank.
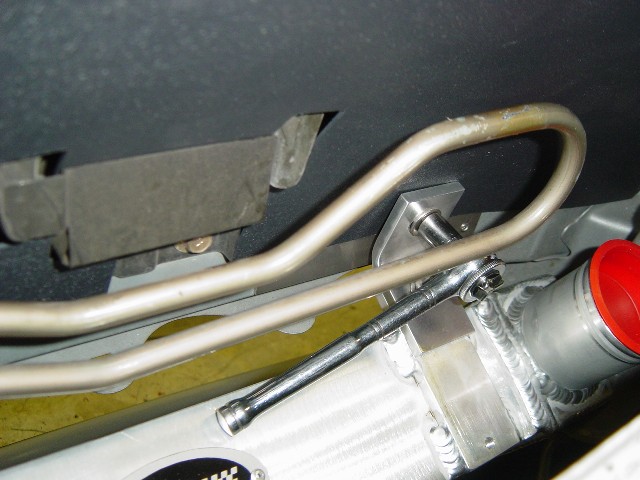
- Reinstall the P/S tube
bracket to the radiator support bracket as
shown in Photo 8-I (Note, photo shows bracket was removed from the
tubes during prototyping)
- If the Intercooler
is not installed do so now so you can verify what area of
the P/S tube needs to be bent as shown in Photo 8-J.
- Remove the Intercooler
and proceed to the bending process.
- The P/S tube needs
to be bent out more straight in the plastic sleeved area
as shown in Photo 8-K. Using the supplied pipe bender bend both tubes
more straight as shown in Photo 8-M.
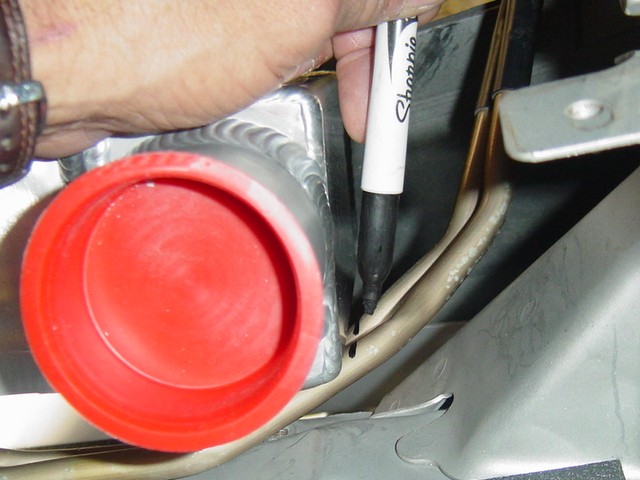
- Test the clearances
around the Intercooler as shown in Photo 8-L. Use a marker
to help designate your next bend.
- After you get
the bend where it will clear the Intercooler side by about
a 1/4" proceed to bend the P/S tubing upwards as shown in Photo
8-N. Some hand bending works as well.
- Continue to test
fit with the Intercooler mounted.
- The P/S tube is
supported by removing the 10mm bolt from the hood latch mechanism
as shown in Photo 8-O and using the supplied tubing clamp. Bend as
necessary to mount in this position.
- After the P/S
tube and Intercooler are complete, install the plastic side
panel as shown in Photo 8-P. Refer to STEP 6
for installation instructions.
 |
 |
 |
| Photo 8-I:
Reinstall P/S tube bracket to the modified radiator bracket |
Photo 8-J:
Bend P/S to meet this position above the I/C bracket |
Photo 8-K:
Using the bending tool begin straighten tubing more |
 |
 |
 |
| Photo 8-L:
Install the I/C and mark for more bending of the P/S tube |
Photo 8-M:
Bend P/S tubing back towards frame gusset |
Photo 8-N:
Continue bending as required |
 |
 |
|
| Photo 8-O:
Install P/S bracket to the hood latch mechanism |
Photo
8-P: Install side panel |
|
8.3 BRP Turbo Power
Steering Reservoir Modification
To make room for the turbo
outlet pipe the power steering reservoir require moving to a further
back location. This requires that the large return line be shortened.
- Make sure the reservoir
is drained per instructions in Section 8.1 above.
- Remove the 10
mm bolts holding the P/S reservoir to aid in pulling the
large return line.
- Remove the spring
clamp from the large return line as shown in Photo 8-I.
- Remove the large
return line and cut off about a 1 1/2" as shown in Photo
8-C.
- Reinstall the
return line to the reservoir and attach the spring clip.
- Insert the 3/8"
barb fitting supplied into the small return line and attach
the spring clip as shown in Photo 8-T.
- Cut the necessary
length required on the oil cooler hose and attach it to the
small return line. Use the supplied hose clamps for the new hose connection.
- Insert the 3/8"
barb fitting supplied into the short hose on the reservoir
and attach the spring clip as shown in Photo 8-U.
- Cut the other
oil cooler line to the length required to attach to the factory
short hose as shown in Photo 8-S. Use the supplied hose clamps for
the new hose connection.
- Move the P/S reservoir
back toward the shock tower support. There is a tapped hole
you will use to hold the reservoir using one of the 10 mm screws you
removed. The bracket close to the shock tower support does not require
another bolt for support. Attach the bolt and secure the reservoir.
|